How to Pin Apps and Websites to Your Chromebook Shelf
Access your favorite apps and websites from the Chromebook Shelf in seconds. Here's how to add them.

Chrome no longer has 'Save and share > Create shortcut' with an 'Open as window' checkbox. To make a site into a shelf app, use the three-dot menu > Cast, save, and share > Install page as app, then pin it. Pinning apps, rearranging, unpinning and Alt + 1 to 8 still work.
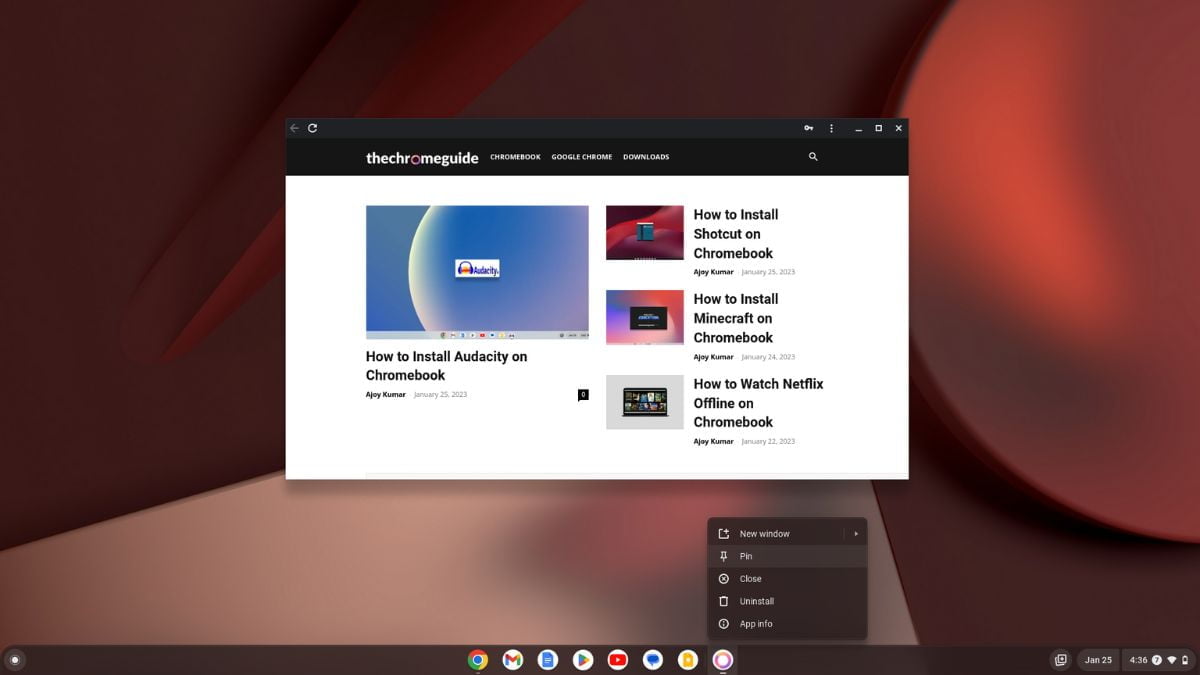
A Chromebook Shelf is similar to the taskbar on Windows or the Dock on a Mac; it is a bar found at the bottom of the screen. You can pin frequently used apps and a website for quick access from the Chromebook Shelf.
Whether you’re working, studying, or just browsing the web, having your most-used apps readily available can improve your efficiency and productivity. Here’s a guide on how to pin your favorite apps and websites to the Chromebook Shelf.
How to Pin Apps to the Chromebook Shelf
The Chromebook Shelf is a bar at the bottom of the screen that contains quick-access icons for apps and files. Adding apps to the Shelf is an easy way to quickly launch your favorite programs and keep them within reach at all times.
By following the steps outlined below, you can add your favorite apps to the Chromebook Shelf:
Step 1: Click on the App Launcher icon to open the App Drawer.
Screenshot not in the archive: Arrow Pointing to App Launcher
Step 2: Here, you’ll get a list of the apps that are installed on your Chromebook. Look for the app you want to add to the Chromebook Shelf.
Note: If you don’t have the app installed on your Chromebook that you want to add to the Shelf, you can install it from the Google Play Store.
Step 3: Now, right-click on the app and select the Pin to Shelf option from the context menu.
Screenshot not in the archive: Chromebook App Drawer With Highlighted Pin to Shelf Option
That’s it! This will add the app icon to the Chromebook Shelf, allowing you to quickly access the app by clicking on its icon present on the Shelf.
How to Pin Websites to Your Chromebook Shelf
Chrome OS also allows you to add a website as a Progressive Web App (PWA) on your Chromebook, and it will act as a native app. You can pin these website apps to the Chromebook Shelf.
Here are the steps you can follow to pin websites to the Chromebook Shelf:
Step 1: Open the Google Chrome browser.
Step 2: Then, visit the website you want to install as a PWA.
Step 3: After that, select the three-dot menu in the upper right corner. Here, you’ll get the context menu. Hover over the Save and Share menu and select the Create Shortcut option.
Screenshot not in the archive: Create Shortcut on Chromebook
Step 4: A dialog box will appear. Here, name your shortcut and click on the Open as Window checkbox. Enabling this feature would always open your website shortcut in a separate window.
Step 5: After that, click on the Create button.
Screenshot not in the archive: Screenshot Showing you to Name your Shortcut on Chrome
Step 6: The website shortcut will be added to the App Drawer. You can use it, to open the website.
Step 7: Now, to pin the website shortcut to the Chromebook shelf, right-click on it and select the Pin to Shelf option.
Screenshot not in the archive: Context Menu with Highlighted Pin to Shelf Option
How to Open the Pinned Items from the Shelf
By following the methods mentioned above, you can add apps and websites to the Chromebook Shelf. Now, to open them, you can click on the app shortcut icon or use a keyboard shortcut, as Chromebooks have tons of keyboard shortcuts.
Here are the keyboard shortcuts you can use to open pinned items: Alt + 1 to open the first item on your shelf, Alt + 2 to open the second item, and so on.
So, you can either click on the app icon on the shelf or use the shortcut to open apps.
How to Rearrange Pinned Items from the Chromebook Shelf
You can also change the shelf item position by rearranging the order of the apps and shortcuts on your Chromebook Shelf.
To do so, you can follow the following steps:
Step 1: Click and hold the app shortcut on the shelf you want to move.
Screenshot not in the archive: Move App Shortcut
Step 2: Drag it to the spot on the shelf where you’d like it to be and release the mouse.
Screenshot not in the archive: Rearrange the App Shortcut on Chromebook
How to Unpin Pinned Apps from the Shelf
If there are some apps and shortcuts that you want to remove from the Chromebook Shelf, then you have to unpin the apps and shortcuts.
For that, right-click on the app and then select the ‘Unpin’ option from the menu that appears.
Screenshot not in the archive: Context Menu with Highlighted Unpin Option
Conclusion
That’s it; this is how you can pin apps and websites to your Chromebook Shelf. Adding apps and websites to the shelf is an easy way to quickly launch your favorite programs and keep them within reach at all times.
However, there are other customization options for the Chromebook Shelf, like changing the position, auto-hiding the shelf, and more. To find out how to customize the Chromebook Shelf, follow the linked guide.

You did it!
You reached the end of this guide. Want to learn one more thing?

Written in 2023 for the ChromeOS and Chrome versions of that time, so menus may look different today. Restored from the Internet Archive copy of 2024-08-08. 8 of 8 screenshots were not saved by the archive; their captions are kept in the text.