How to Access Android Settings on Chromebook
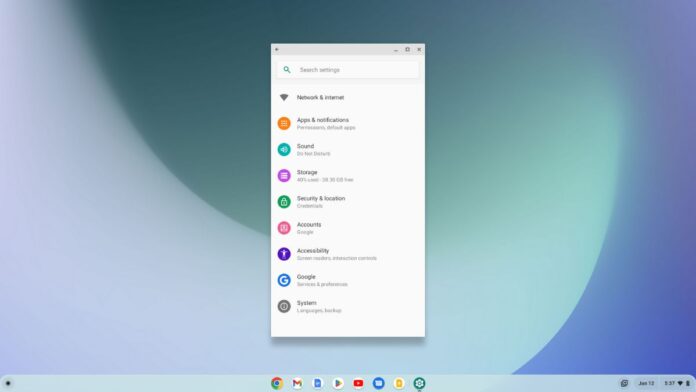
All the latest Chromebooks have built-in Android support that power the Google Play Store and allow you to download and install the Andriod application. And you can manage your Android application easily without accessing the Android settings.
However, if you want to access the Android part of your system, there is no direct way to access the Android settings. It is similar to the smartphone settings, where you can tweak different settings options.
How to Access Android Settings on Chromebook
Every Chromebook uses a specific version of Android to power the Google Play Store. To know which Android version you are running on your Chromebook. You can check our guide on it.
Now, let’s discuss how you can access the Android settings on a Chromebook.
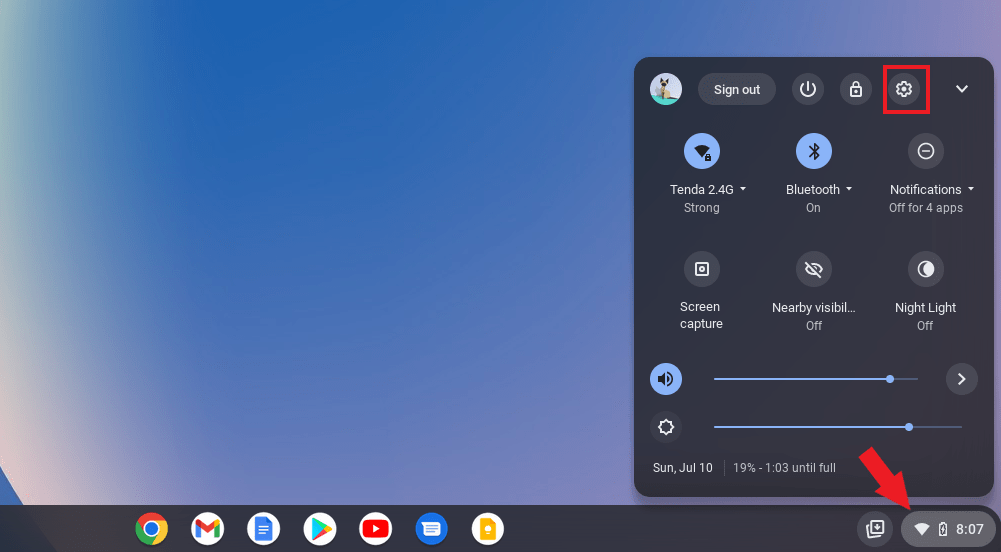
Step 1: Click the “Quick Settings Panel” in the lower right corner of your screen. Then click on the gear icon to open the “Settings” application.
Step 2: You’ll see the settings window. Click on the “App” tab located on the left side of your screen. Then select “Google Play Store” from the menu on the right side of your screen.
Screenshot not in the archive: Google Play Store Settings
Step 3: Click the “Manage Android Preferences” option to open the Android settings.
Screenshot not in the archive: Android Preferencess Settings on Chromebook
Step 4: It will open the Android setting of your Chromebook. It is similar to a smartphone settings application. Here you get – Network & Internet, Apps & notifications, Storage, security & Location, and more. You can browse through the setting app to find the settings you are looking for.
Screenshot not in the archive: Android Interface on Chromebook
Conclusion
That’s it; this is how you can access Android settings on Chromebook. You also can check out our Chromebook troubleshooting guide if you are new to Chromebook and Chrome OS.
I hope this Chromebook guide was helpful to you. If you liked the article, share it with your friends. If you have some suggestions or doubts, do not hesitate to leave them in the comments section. We are always there to assist you.

You did it!
You reached the end of this guide. Want to learn one more thing?

Written in 2023 for the ChromeOS and Chrome versions of that time, so menus may look different today. Restored from the Internet Archive copy of 2023-06-08. 3 of 4 screenshots were not saved by the archive; their captions are kept in the text.